Cloud Heater™ CH1
Quick Setup Instructions
with WiFi Accessory
Read the entire Cloud Heater CH1 User’s Guide before plugging in or operating a Cloud Heater device
Email: heatwithbenefits@gmail.com
Web: heatwithbenefits.com
Copyright© 2020 Heat with Benefits LLC. All rights reserved.
Heat with Benefits™ and Cloud Heater™ are trademarks of Heat with Benefits LLC, Beaverton OR
Included
Cloud Heater CH1 device with installed air filter, attached power cord, and User’s Guide
Optional Wifi Accessory (TP-Link with included setup guide)
Heater Requirements
Three-prong, properly grounded and polarized, 120V 50Hz permanent electrical outlet*
* Never use an extension cord or outlet splitter with a Cloud Heater device. Always plug attached power cord directly into the electrical outlet.
* A 15 Amp, 120 Volt, 50-60Hz alternating current (VAC) circuit, with ground, is required. A dedicated circuit is preferred but not essential in all cases. A dedicated circuit will be required if, after installation, the circuit breaker trips or blows fuses on a regular basis when the heater is operating. Additional appliances on the same circuit may exceed the current rating of the circuit breaker. Wiring must comply with local building codes and other applicable regulations to reduce the risk of fire, electric shock and injury to persons. Never attempt to wire your own new outlets or circuits.
Heater Setup
1. Find a Good Location.
Make sure the area will be clear around the heater
Locate within 4ft of a suitable electrical outlet, where the power cable will not be a trip hazard
2. Place the Heater.
Place with at least 6 inches of clearance behind it
Remember, a Cloud Heater CH1 is heavy, so only move one with help.
3. Turn off the thermostat by twisting the dial until the black bar points to OFF.
4. Plug the Cloud Heater power cord directly into the wall outlet.
5. To use as filter, without heating, turn thermostat to FAN
6. To Heat, turn Cloud Heater thermostat dial to desired temperature.
WiFi Accessory Requirements
· Network name and password for a nearby 2.4GHz WiFi network with
WPA2 security
Internet connection with at least 10MB/sec upload and download rates
· Android or iPhone mobile device with WiFi for Cloud Heater WiFi Accessory setup and control
WiFi Accessory Installation:
1. Locate the “TP-Link Range Extender” accessory box. It will be located in the interior of the bench style heater or connected to the back of the cabinet style heater. Open it and remove the WiFi device and quick setup guide.
2. Install the TP-Link Tether application on mobile phone from Google Play Store or Apple Store.
3. Turn off Cloud Heater thermostat and unplug power cord from the electrical outlet.
4. Plug Cloud Heater CH1 ethernet connector (on the back of the heater) into the range extender
Bench: Range extender goes inside bench, on the back of the metal box.
Cabinet: Range extender connects to the back, just below the power cord connection.
5. Plug the range extender into the accessory power outlet on the back of the Cloud Heater CH1
6. Plug heater power cord directly into electrical outlet
7. Turn on the thermostat fully.
8. Follow the TP-Link Range Extender Quick Setup guide and TP-Link Tether application to connect the extender to the desired 2.4GHz WiFi network.
· Quick tip: the on-screen iPhone and Android keyboards like to auto capitalize things. Be very careful to verify the capitalization is correct when you enter your WiFi password.
· When connected properly to your WiFi, both blue LED lights on the range extender should remain lit up. If there is only one solid blue LED, or a blue and red LED lit, return to the TP-Link quick setup guide and try again.
Create or Log In to Your Heat with Benefits Account
Use your phone camera to scan the following QR code or go to the following web site:
https://heatwithbenefits.com/status.html
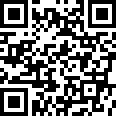
Once logged in, you can check the status of your heater. Soon, you’ll be able to check your benefits balance, manage your benefits payments, and update your account information.